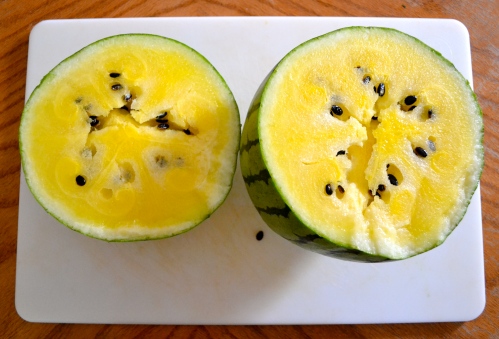
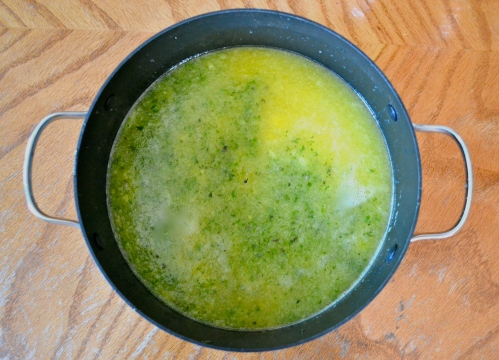
Hi, misfits! Today I want to introduce you to an overlooked and underappreciated character on this blog. Everyone? Take a good look at those photos up there, and say hi to Crap Table.
Hi, Crap Table!
Crap table is old and rickety and faux-ish wooden and scratched-up and borrowed, but it’s quite the trooper and it does the job. In fact, the half-Jew in your BMG might even go so far as to call it a Real Mensch.
Real Crap Mensch Table.
Well, now that you all know Real Crap Mensch Table, I’d like to get to the real reason I called you all here today…
Real Crap Mensch Table has a serious wood glue problem, and this is an intervention.
No, wait, that wasn’t right…why were we here again?
Oh, right, we’re moonshining again! Twist your arms, why don’t I?
You just know you’ve got some melon on its last legs sitting in your fridge taking up valuable space. And that unstoppable Robocop garden mint (unsurprisingly, not the first time I’ve compared a plant to Robocop) needs its ranks thinned out SOMEHOW since apparently the cold weather is doing NOTHING to dampen its spirits (GOD COLD WEATHER WHY YOU SO LAZY YOU NO HELP ME NONE).
So why not do what we always do in times like these, Pinky?
What is it we always do in times like these, you ask?
Why, we band together and we moonshine! We moonshine for all we’re worth. We moonshine to prove to the bad guys–NAY–to ourselves, that we will not be defeated. Because united we stand, divided we fall, but when we come together to moonshine, we stand up and then fall and then repeat the process again and again!
Kinda makes me tear up just thinkin’ about it.
**I’m linking to a reliable source for any optional special equipment or ingredients, and am telling you when there’s a free alternative. Before settling, though, consider that most of this stuff is surprisingly dirt-cheap, SIGNIFICANTLY easier, and will last you. Why not invest in your future as a slutty moonshiner?**
Homemade Watermelon Mint Wine
Makes 1 Gallon
Go Get:
a buncha water
3 lbs. honey or 6 cups sugar
4 lbs. watermelon cubes, seeded (yes, I am ruining your whore-tastic manicure)
1 cup packed mint leaves
juice of 3 freshly-squeezed lemons (don’t use the preserved stuff in the bottle)
1/2 cup strong black tea
1 packet wine yeast
OPTIONAL: 1 tsp. yeast nutrient
OPTIONAL: 1/2 teaspoon pectic enzyme (gobbles up the suspended pectin to prevent the formation of snotty-looking ropes and haze in your wine)
Special Stuff you’ll want to have on hand:
*A primary fermenter: 1 gallon glass jug, crock, or food grade bucket–recycled wine jugs are, obviously, perfect for this
*An auto-siphon with tubing for transferring the wine from the fermenter to the bottles without kicking up sediment; you can also just use about 4 feet of clear, plastic tubing if you’re willing to siphon manually. If you REALLY don’t care about wine clarity or the potential for off flavors, you can use a kitchen ladle to separate wine from sediment, but you’ll need a wide-mouthed fermenter, like a bucket or crock.
*Bottles for the finished wine: 5 750-ml wine bottles (recycled is fine), or a 1 gallon wine jug, or swing-top beer growlers; if you’re not using wine bottles fitted for a screw top, make sure you have the corks for sealing them. Sanitized, plastic 2-liter soda bottles aren’t ideal, but they’ll also work as long as you cover them to keep out light–you’ll need about 2 2-liter bottles
*A fine mesh sieve for straining the pureed fruit
*OPTIONAL: A hydrometer (not necessary, but it’ll help you figure out how alcoholic your wine is and how far along the fermentation is)
*OPTIONAL: Airlock (this keeps air from getting to your wine while still letting CO2 from the fermentation escape–you can also use plastic wrap and a rubber band to seal, though results are not as secure
*OPTIONAL: Rubber bung (heh heh…bung) to seal the fermentation jug (if you’re using one) and have a place to stick the airlock-if you’re using a fermentation bucket, the airlock can go into a pre-drilled hole in the lid. If you’re not using an airlock, do that plastic wrap/rubber band thing.
*OPTIONAL: Candy or meat thermometer (highly recommended)
Go Do:
Clean, rinse, and sanitize all tools, spoons, etc.–basically anything that is going to be touching the wine and isn’t getting boiled needs to be cleaned, rinsed, and sanitized. See my post on doing that for the products and processes you’ll want to use.
Puree watermelon and mint in batches in a food processor. The resulting mixture will be thin and soupy (about 9 1/2 cups). Put it in a large pot with 2 cups water and all the honey or sugar.
Heat until very hot, but not boiling (185 degrees), and hold it at that temp for half an hour, stirring occasionally. Meanwhile, boil a second pot of water and let it cool down to room temperature (70 degrees F).
Pour the hot fruit mixture through the fine mesh sieve into a sanitized bowl or pot.
Toss the pulp into the compost heap, or find a fun use for it and share your idea with the class. Now stir in the lemon juice, tea, yeast nutrient, and pectic enzyme, if using.
Cool the mixture to room temperature (you can set the mix over an ice water bath, as shown, to speed the cooling process), and pour into the fermenter.
If the wine doesn’t fill the 1 gallon fermenter to within a few inches of the top, add water from the spare water pot (the one you boiled and cooled) and stir. Take a reading with your hydrometer if you’re using one–write the number down for later (mine was 1.113).
Now take a half cup of the spare pot water and sprinkle on the yeast packet. Let it sit for ten minutes to allow the yeast to reacclimate. Then throw the yeast mixture on top of the wine mixture. No need to stir, the yeast does a good job of that.
Now put in the rubber bung (heh heh) and airlock (or put on the lid and airlock, or use some plastic wrap secured with a rubber band). Make sure you half fill the airlock with water to make it effective. You may want to set the fermenter in a larger bucket in case there’s spillover during fermentation. Put the whole deal in a dark, room-temp location.
Now we wait. We let the yeast do their thing, periodically checking to make sure there’s still water in the airlock. Over the next week or two, you’ll hear lots of bubbling and gurgling going on and will see bubbles coming out the airlock. It’s a beautiful thing. Then things slow down and yeast die and drop to the bottom of the fermenter–ah, sediment, can’t live with you, can’t live withou–actually, I just can’t live with you.
Anyhow. If you were an advanced winemaker, you’d transfer the wine to secondary and tertiary fermenters, but it’s not strictly necessary, and I’d like to keep things simple for you beginners. Leave the wine in that fermenter for about 2 months–the wine should have stopped fermenting and will hopefully have cleared itself (if you didn’t use pectic enzyme, or let the mixture boil, it may never clear completely).
At this point, a hydrometer really comes in handy to know how much sugar, if any, is left in the wine. If the yeast have eaten all the sugar, you can safely bottle your wine. Use this handy online calculator to figure out the final alcohol percentage of your finished wine. You can test-sample, but fair warning, IT WILL BE HARSH AND PUNISHING, MISFITS. Worry not, it shall improve immeasurably with time. Just. Like. Us.
Now use your sterilized auto-siphon to transfer the wine from the fermenter (on a table or counter) to your sanitized wine bottles (on the floor), being sure to leave the sediment in the bottom of the fermenter. If you’re using plastic tubing, set one end in the primary fermenter, the other end in your mouth–suck until the wine siphons up into the tube and quickly stick it into the secondary fermenter to catch the wine in time. Then send me a video of you sucking on the tube. If you’re ladling, well, ladle away! You’ll have to leave enough space at the top of the wine bottles for sealing, about 2 inches.
Now seal using a corker if you’re fancy or a rubber mallet and some bravery if you’re not, or just apply the swing tops or screw-tops. Put the containers back into a cool, dark location, stored sideways if you used corks, and let your wine age for a minimum of six months–a year is even better.


